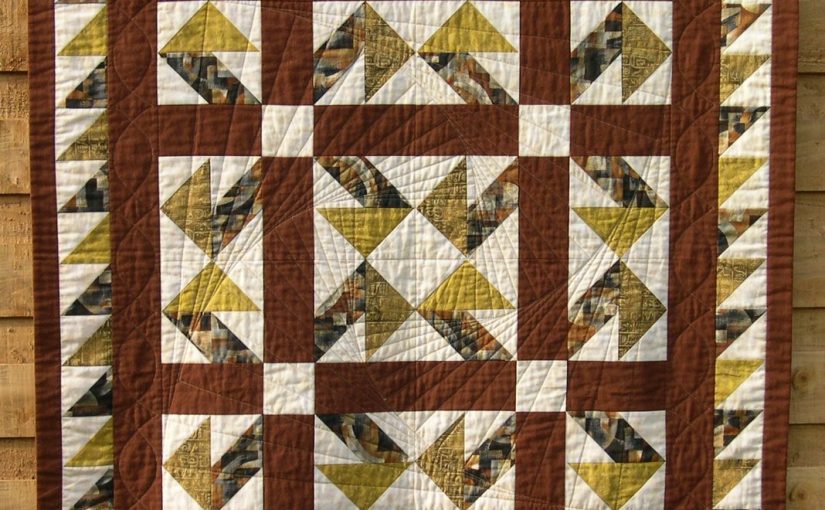
Jack-in-a-Box was one of the earliest quilts I designed when I began to be interested in developing quick-piecing methods. It is a 45″ square lap quilt which can also be hung on the wall; the download pattern is available in my online Shop.
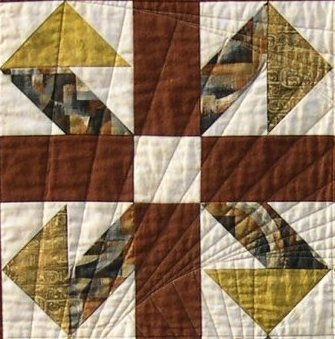
One of the things that intrigues me about patchwork is the secondary designs which develop when blocks are placed immediately next to one another – this is called being set “flush”.
Many people can’t reliably find the block when they look at this completed quilt, because their eye is drawn to the central area where four block corners with the hooked arms meet – and they also mistakenly think that the brown rectangles are sashing strips.
As you can see in the block above, the brown rectangles are actually at the centre of each block. Look what happens where one block meets another – see if you can pick out the four blocks in the finished quilt.
This block can be classified as a “five-patch” because the geometry of the design can be fitted onto a 5 x 5 grid. It’s useful to be able to identify this if you want to work out how to draw out a block yourself.
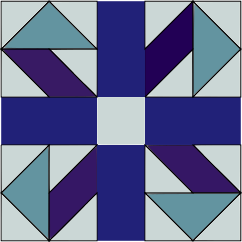
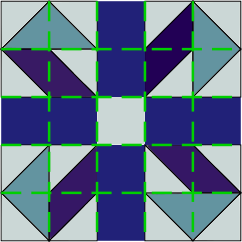
Jack-in-a-Box contains two rectangular units – the well known “Flying Geese” unit, and a similar unit with a parallelogram.There are various published quick-piecing methods for making Flying Geese units, but some of them, such as the well-known “flip corners” method are very wasteful on fabric, as excess triangles are discarded.
I realised that if slightly bigger pieces are used initially, the excess can become half-square triangle units, which I chose to use in a pieced border. Details of this technique are shown on the Catherine Wheel page – another smaller project which developed out of this one.
As always, I have worked out which way to press the seams so that they always meet pressed in the opposite direction, making it easy to achieve perfect points. Have a look at the Techniques pages if you would like to know how to work this out yourself – its all in the pattern if you buy it, of course.
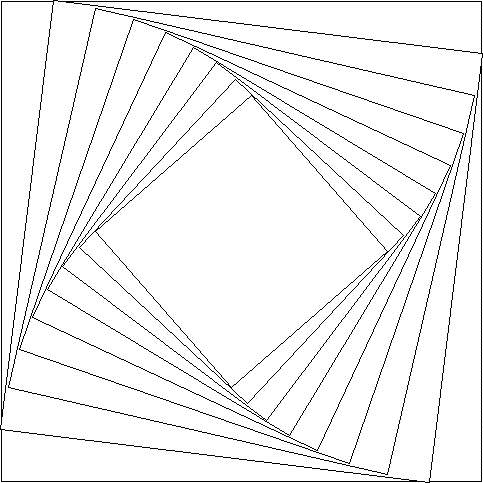
The pattern also includes instructions on how to draw this swirling quilting design. If like me, you grew up in the Sixties or Seventies, you may remember that designs like these were very popular, made by winding metallic string around a pattern of nails, or stitching through card.
Straight lines magically turned into curves, making a very effective complement to the patchwork.
It’s easier to mark than you might think, and because it doesn’t contain any tight curves, can be machine quilted easily with a walking foot.
If you would like to look at other projects, click here to go to the Wallhangings page, the Bed Quilts page, the Card Hangers page or the Bags page.
